TableAir
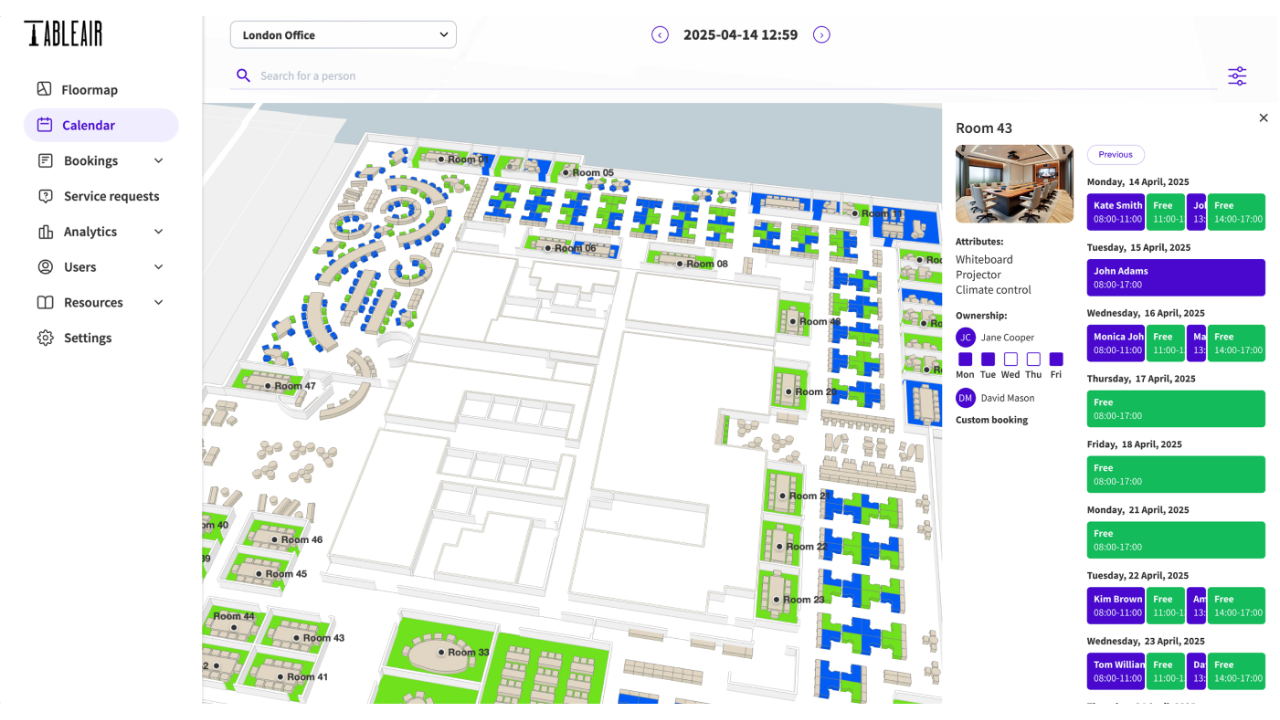
TableAir simplifies hybrid work by giving teams control over desks, meeting rooms, parking, and visitor access. This integration connects your Mappedin indoor maps to TableAir so teams can find spaces, book rooms, and analyze usage across buildings and floors.
Request Access
To get started, contact Mappedin to coordinate setup with TableAir.
Configuration Instructions
Step 1: Map a Venue
Sign up for an account and map a venue, labeling bookable rooms and desks appropriately.
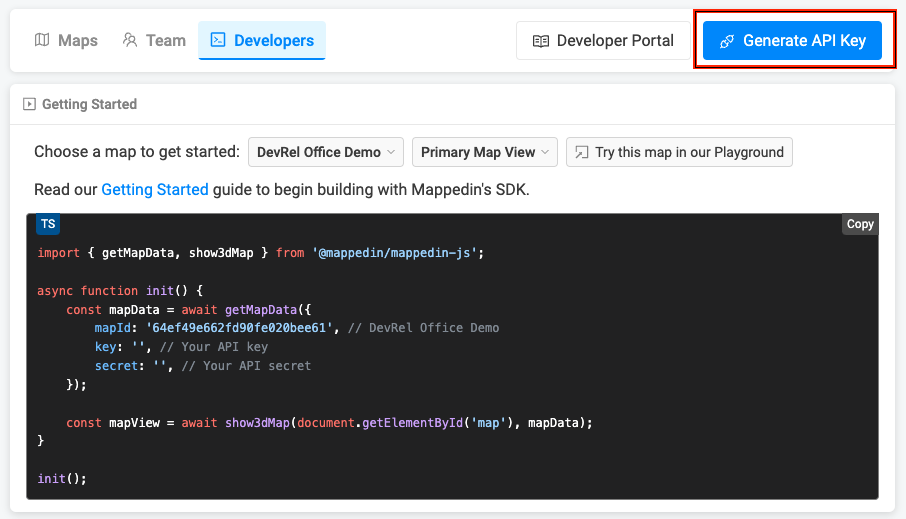
Step 2: Create a Mappedin Key and Secret
A key and secret to use Mappedin Demo maps can be found on the Demo Keys & Maps Page. To use your own maps, create your own unique key and secret.
Using maps with your own key and secret requires a Pro or Solutions Map Account.
- Log into Mappedin Maker.
- Click on the
Developerstab. - Click
Generate API Key. - Enter a name for the key.
- Click
Generate Key. - Store the
keyandsecretis a safe and secure place.
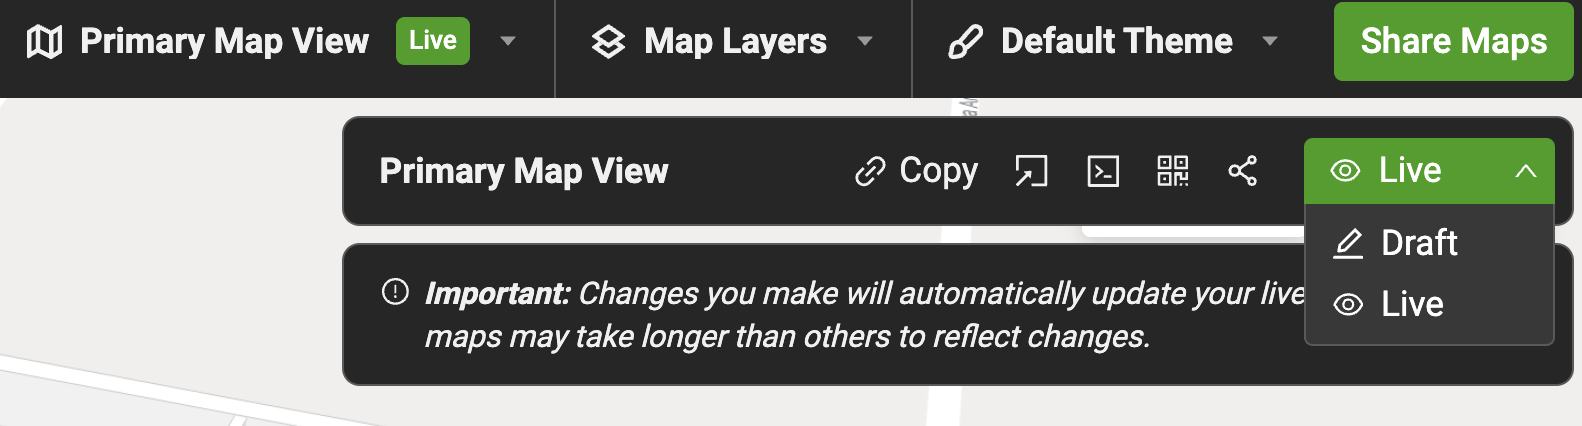
Get a Map Id
Each map has a unique identifier used by Mappedin JS to load a map. To get the mapId of a map:
- Log into Mappedin Maker.
- Click on the
Developerstab. - Select the desired map from the dropdown.
- The
mapIdwill be shown in the code snippet.

Not seeing your map?
- Remember to set the map to Live. To do so click on the
Share Mapsbutton and changeDrafttoLive. - Integrations require a Pro or Enterprise Map Account. Demo API Keys will only work for Mappedin demo maps.
Step 3: Contact Mappedin
Contact Mappedin with the API key and default settings. Mappedin will configure the integration with TableAir.
Step 4: Create a TableAir Master User
A link will be sent to create a TableAir master user. TableAir will assist with the next steps.
For more info at TableAir, please refer to the TableAir Mappedin Integration Page.