Prerequisites
This guide goes a step deeper from the React Native Getting Started -guide, which helps you set up a new React Native project from scratch and install Mappedin React Native SDK as a dependency.
Setup
This example requires an additional library @react-native-picker/picker that will work as our map selector. Install the library with yarn add @react-native-picker/picker.
Remember to run cd ios && pod install in your project folder to install dependencies required for iOS simulator. For Android Emulator, just rebuild the application with yarn run android.
Selecting the level
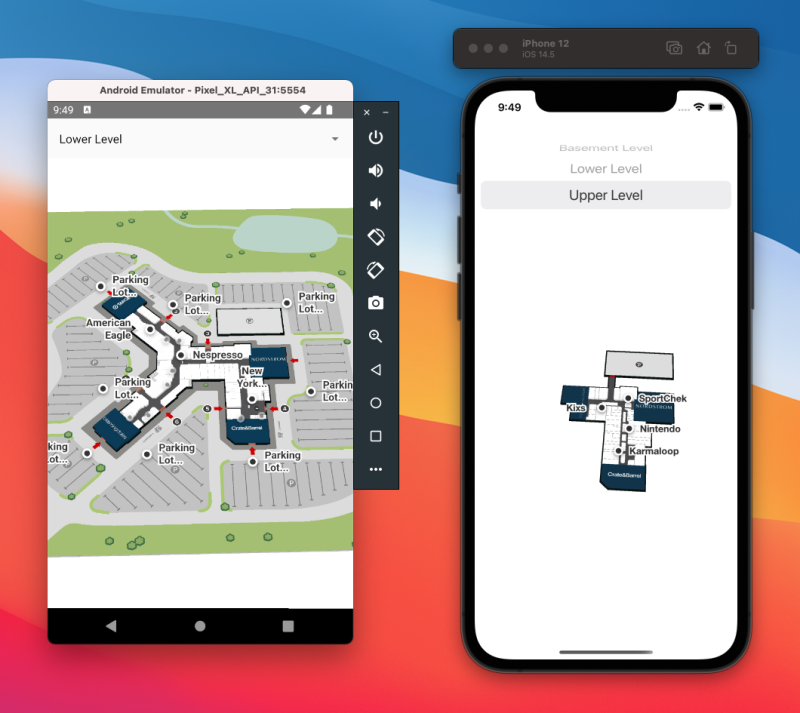
If you're working with a venue that has multiple maps, such as a venue with multiple floors, you may want to create a level selector to allow the user to select a level. This guide uses a popular React Native community library to demonstrate the concept.
The <MapPicker /> component below will render a dropdown-like selector using the map names of MappedinMap objects. Inside our main <App /> component, we will declare two state variables, which the MapPicker uses to render the level options and display the currently selected one.
const [levels, setLevels] = React.useState<MappedinMap[]>();const [selectedMapId, setSelectedMapId] = React.useState<MappedinMap['id']>();
const MapPicker = () => { if (!levels) return null;
return ( <Picker mode="dialog" selectedValue={selectedMapId} onValueChange={mapId => { setSelectedMapId(mapId); }}> {levels.map(m => ( <Picker.Item key={m.id} label={m.name} value={m.id} /> ))} </Picker> );};Next, we need to listen to changes to selectedMapId and run the asynchronous mapview.current?.setMap function to change the displayed map. We make sure the selectedMapId is different from the current map for cases when the map is changed outside of the selector.
React.useEffect(() => { async function setMap() { // Making sure the new map is different from the currentMap if (selectedMapId && selectedMapId !== mapView.current?.currentMap?.id) { await mapView.current?.setMap(selectedMapId); } } setMap();}, [selectedMapId]);We also should set up the map selector and the state as soon as the map is loaded. We can use the onFirstMapLoaded -callback of TMiMapViewProps for that.
onFirstMapLoaded={() => { setSelectedMapId(mapView.current?.currentMap?.id); setLevels(mapView.current?.venueData?.maps);}}onMapChanged-callback is executed when the map is changed. This happens for example during multi-floor navigation when the user taps the tooltip to move to the next floor. This makes sure that the selector stays in sync with those changes.
onMapChanged={({map}) => { setSelectedMapId(map.id);}}The result

Complete code example
import React from 'react';import {SafeAreaView} from 'react-native';import {Picker} from '@react-native-picker/picker';
import {MappedinMap, MiMapView} from '@mappedin/react-native-sdk';import type {MapViewStore} from '@mappedin/react-native-sdk';
const App = () => { const mapView = React.useRef<MapViewStore>(null); const [levels, setLevels] = React.useState<MappedinMap[]>(); const [selectedMapId, setSelectedMapId] = React.useState<MappedinMap['id']>();
const MapPicker = () => { if (!levels) return null;
return ( <Picker mode="dialog" selectedValue={selectedMapId} onValueChange={mapId => { setSelectedMapId(mapId); }}> {levels.map(m => ( <Picker.Item key={m.id} label={m.name} value={m.id} /> ))} </Picker> ); };
React.useEffect(() => { async function setMap() { if (selectedMapId && selectedMapId !== mapView.current?.currentMap?.id) { await mapView.current?.setMap(selectedMapId); } } setMap(); }, [selectedMapId]);
return ( <SafeAreaView style={{flex: 1}}> <MapPicker /> <MiMapView style={{flex: 1}} key="mappedin" ref={mapView} options={{ clientId: '<MAPPEDIN_CLIENT_ID>', clientSecret: '<MAPPEDIN_CLIENT_SECRET>', venue: 'mappedin-demo-mall', perspective: 'Website', }} onFirstMapLoaded={() => { setSelectedMapId(mapView.current?.currentMap?.id); setLevels(mapView.current?.venueData?.maps); }} onMapChanged={({map}) => { setSelectedMapId(map.id); }} /> </SafeAreaView> );};
export default App;For more examples in topics such as directions and BlueDot positioning in React Native, have a look at our example repository.