Wayfinding
Using Mappedin SDK for iOS with your own map requires an Enterprise license. Try a demo map for free or refer to the Pricing page for more information.
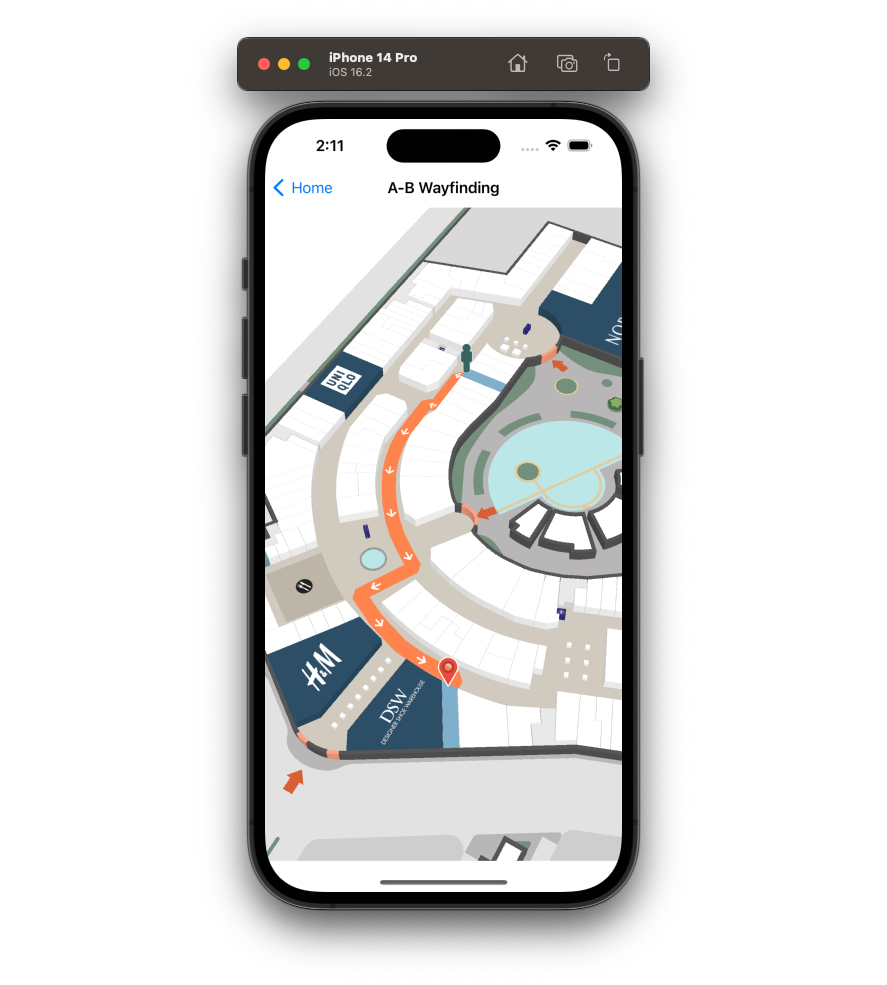
Wayfinding is one of the most often used features of digital maps and the Mappedin SDK for iOS makes it incredibly easy to draw a path from A to B. It only takes a known start and end location to generate directions, which can be passed to MPIJourneyManager to draw it on the map.
A complete class that uses the code snippets in this guide can be found in the Mappedin iOS Github repo: ABWayfindingVC.swift
Single-Destination Wayfinding
We can use the onFirstMapLoaded function of the MPIMapViewDelegate to present wayfinding directions when the map loads. Select your departure and destination locations from venueData and supply them as the "to" and "from" for getDirections(). In the callback, pass the resulting directions to journeyManager.draw() to display the route.
func onFirstMapLoaded() {
  let departure = mapView?.venueData?.locations.first(where: { $0.name == "Pet World" })
  let destination = mapView?.venueData?.locations.first(where: { $0.name == "Microsoft" })

  mapView?.getDirections(to: destination!, from: departure!) {
      directions in
      self.mapView?.journeyManager.draw(directions: directions!)
  }
}
journeyManager exposes the MPIJourneyManager helper class to display single and multi-destination wayfinding easily on the map. Functionality of the Journey could be replicated by drawing the paths and adding well designed tooltips at connection points.
Wayfinding From A User's Location
To find out how to start the journey from the user's current location, refer to Wayfinding from Blue Dot in the Blue Dot Guide.
Multi-Floor Wayfinding
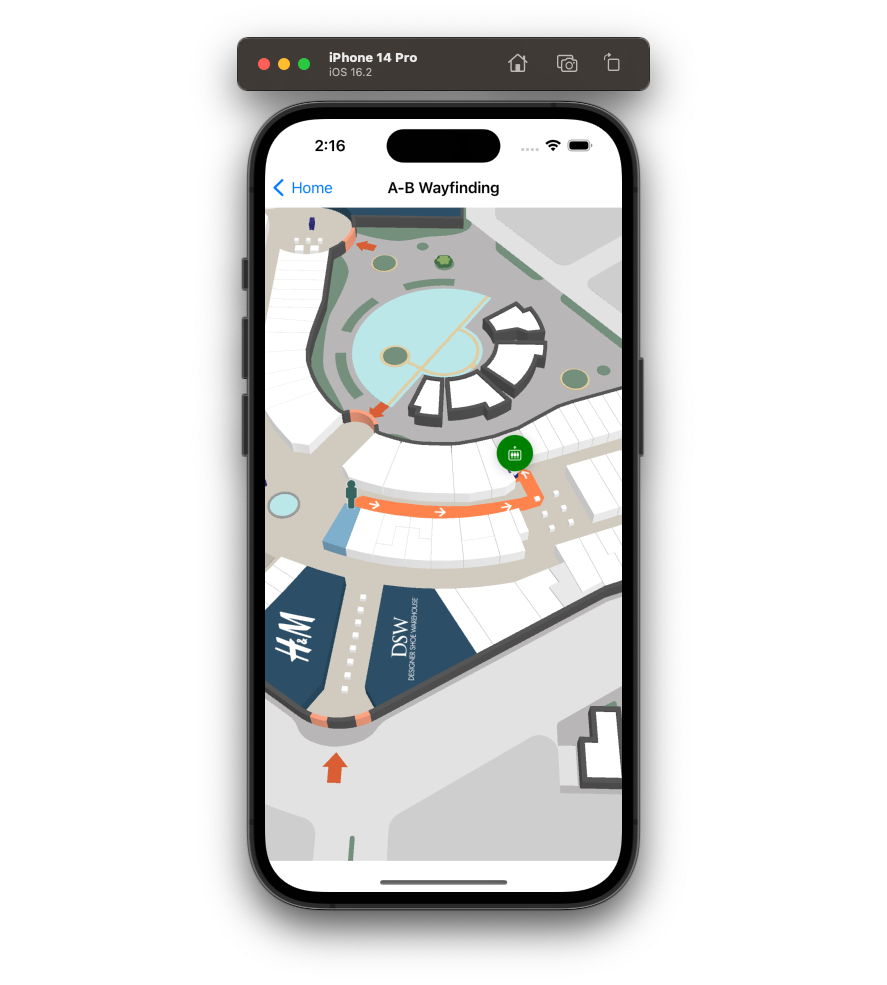
Using MPIJourneyManager helper, no additional work is needed to provide wayfinding between floors. Whenever a user needs to switch a floor, an interactive tooltip with an icon indicating the type of connection (such as an elevator or escalator) will be drawn. By tapping the tooltip, the map view switches to the destination floor.
Wayfinding Using Accessible Routes
When requesting directions for a journey, it is important to consider the needs of the user. Users with mobility restrictions may require a route that avoids stairs and escalators and instead uses ramps or elevators.
The MPIMapView.getDirections() method accepts an accessible boolean flag, which allows specifying whether an accessible route should be returned. By default, the shortest available route is chosen. The following code demonstrates how to request directions that make use of accessible routes.
mapView?.getDirections(to: destination!, from: departure!, accessible: true) {
    directions in
    self.mapView?.journeyManager.draw(directions: directions!)
}
Multi-Destination Wayfinding
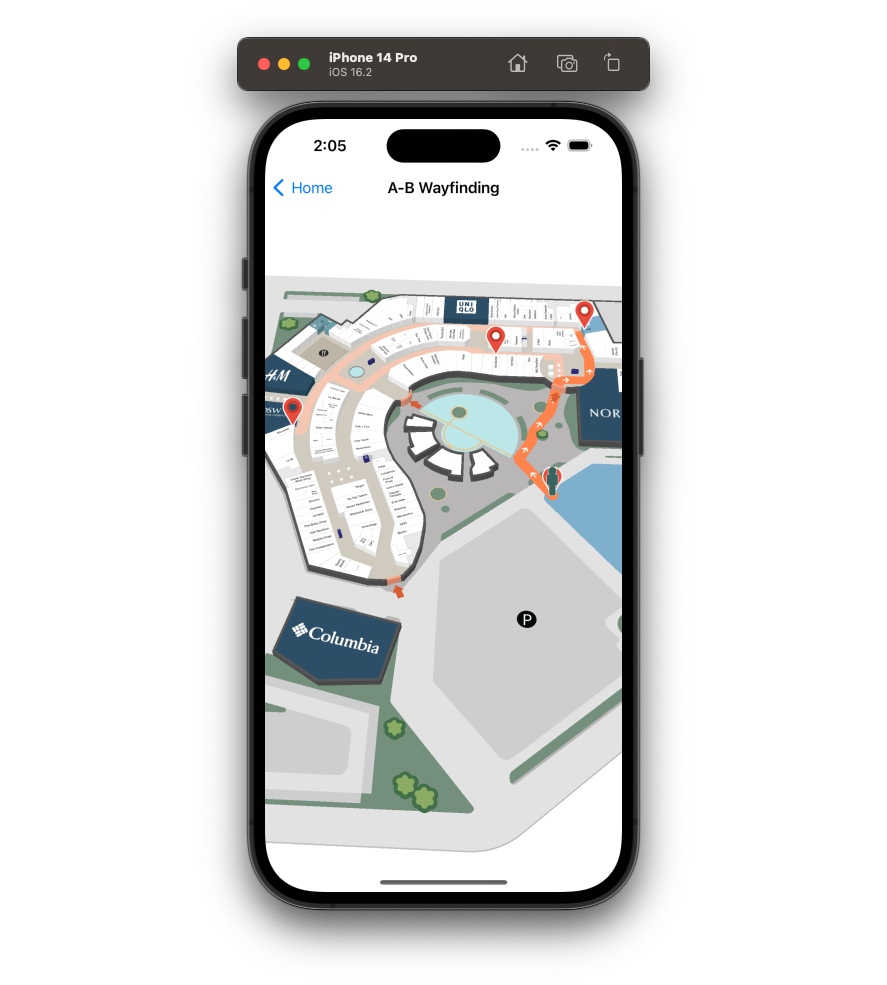
With the Mappedin SDK, it's possible to draw a path including multiple waypoints. To generate directions, create an MPIDestinationSet from polygons, locations or nodes and request directions from a starting location with getDirections().
Create a couple of properties for the UIViewController which we will use to store the current step number and the destination list. Use the onFirstMapLoaded function in MPIMapViewDelegate to draw the route once the map is ready.
// UIViewController
var step: Int = 0
var destinations: [MPILocation?] = .init()

// MPIMapViewDelegate
func onFirstMapLoaded() {
    let departure = mapView?.venueData?.locations.first(where: { $0.name == "Parking Lot E" })
    destinations = [
        mapView?.venueData?.locations.first(where: { $0.name == "Apple" }),
        mapView?.venueData?.locations.first(where: { $0.name == "Microsoft" }),
        mapView?.venueData?.locations.first(where: { $0.name == "ThinkKitchen" }),
        mapView?.venueData?.locations.first(where: { $0.name == "Parking Lot E" }),
    ]
    mapView?.getDirections(to: MPIDestinationSet(destinations: destinations as! [MPINavigatable]), from: departure!) {
        directions in
        self.mapView?.journeyManager.draw(directions: directions!)
    }
}
Once the user has completed a segment of the journey, the active step can be changed with journeyManager.setStep(). The following will move through the steps when user clicks outside of interactive polygons on the map using the onNothingClicked function.
func onNothingClicked() {
    step += 1
    mapView?.journeyManager.setStep(step: step % destinations.count)
}
Wayfinding Without Using Journey
While MPIJourneyManager is a great utility for drawing a single path with all the features, it may sometimes be limiting. For instance, you may only draw one Journey at a time, and subsequent calls to journeyManager.draw() will overwrite the previous.
For full control over the route, draw the path using the MPIPathManager.add() and pass it the directions.path.
func onFirstMapLoaded() {
    let departure = mapView?.venueData?.locations.first(where: { $0.name == "ThinkKitchen" })
    let destination = mapView?.venueData?.locations.first(where: { $0.name == "American Eagle" })

    guard departure != nil && destination != nil else { return }

    mapView?.getDirections(to: departure!, from: destination!) {
        directions in
        self.mapView?.pathManager.add(nodes: directions!.path)
    }
}
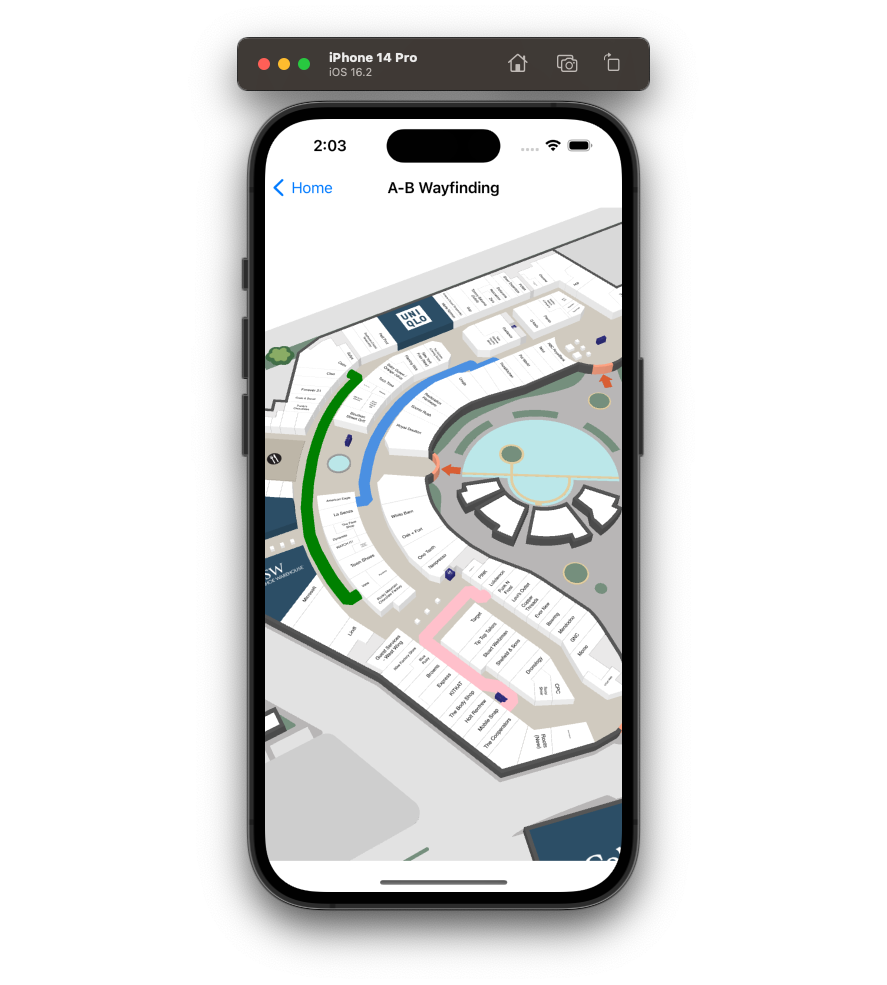
This creates a basic path with no extra features. Using this method, you will need to handle both multi-floor navigation and multi-destination wayfinding manually using markers and by drawing multiple paths.
We can draw a secondary path the same way as the first while providing different start and end locations. To make this new path stand out, style it a different color by changing the color property. The documentation for MPIOptions.Path covers the other options available to you.
self.mapView?.pathManager.add(nodes: directions!.path, options: MPIOptions.Path(color: "green"))
X-Ray Paths
X-Ray Paths are currently an experimental component of the Mappedin SDK. While in this state, some features may not behave as intended and APIs may be changed. Experimental features are being tested together with early adopters to fine-tune them.
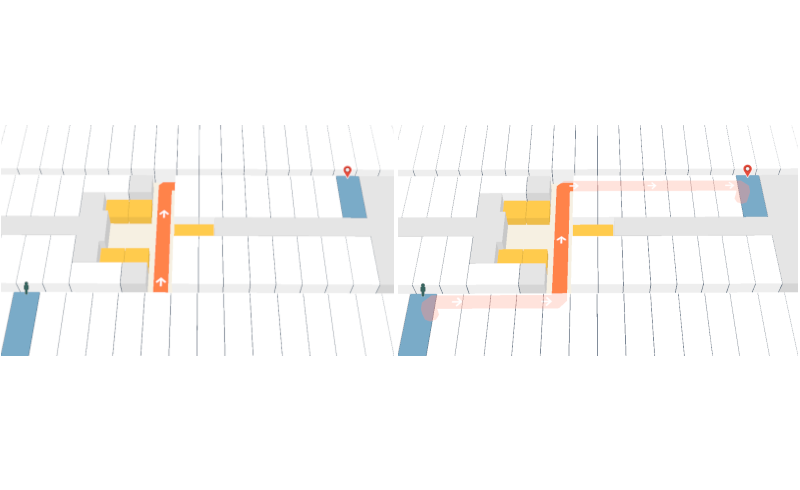
Maps with narrow corridors can benefit from using X-Ray Paths for wayfinding. When enabled, X-Ray Paths cause polygons, such as walls or desks, to become transparent when a path is drawn behind them. This allows the path to remain visible. The screenshot below illustrates a path between cabins on a cruise ship with X-Ray Paths disabled on the left and enabled on the right.
X-Ray Paths are enabled and disabled using the boolean xRayPath parameter of MPIOptions.ShowVenue object passed to loadVenue.
X-Ray Paths are enabled by default, but they do require multiBufferRendering to also be enabled. multiBufferRendering is currently disabled by default. The code sample below demonstrates enabling both xRayPath and multiBufferRendering.
mapView.loadVenue(options:
    MPIOptions.Init(
        clientId: "clientId",
        clientSecret: "clientSecret",
        venue: "venueSlug"
    ),
  showVenueOptions: MPIOptions.ShowVenue(multiBufferRendering: true, xRayPath: true))
Note: A complete class that uses the code snippets in this guide can be found in the Mappedin iOS Github repo: ABWayfindingVC.swift