Locations
Prerequisites
This guide goes a step deeper from the React Native Getting Started -guide, which helps you set up a new React Native project from scratch and install Mappedin SDK for React Native as a dependency.
Setup
Let's start by setting up our imports, the <App /> component and an empty React Native stylesheet. We will render a list of locations and their descriptions so to keep everything readable, we need to apply some basic styling at the end.
import React from 'react';
import { FlatList, ListRenderItem, Text, StyleSheet, View, SafeAreaView } from 'react-native';

import { Mappedin, getVenue, MappedinLocation } from '@mappedin/react-native-sdk';

const App = () => {};

const styles = StyleSheet.create({
	loading: {},
	container: {},
	venueName: {},
	item: {},
	title: {},
	description: {},
});

export default App;
Loading Venue data without displaying a map
It is possible to fetch venue data (locations, maps, etc), outside of the <MiMapView /> component. This can be helpful for cases where a map isn't always needed or there is a need to fetch the data first, and render the map later.
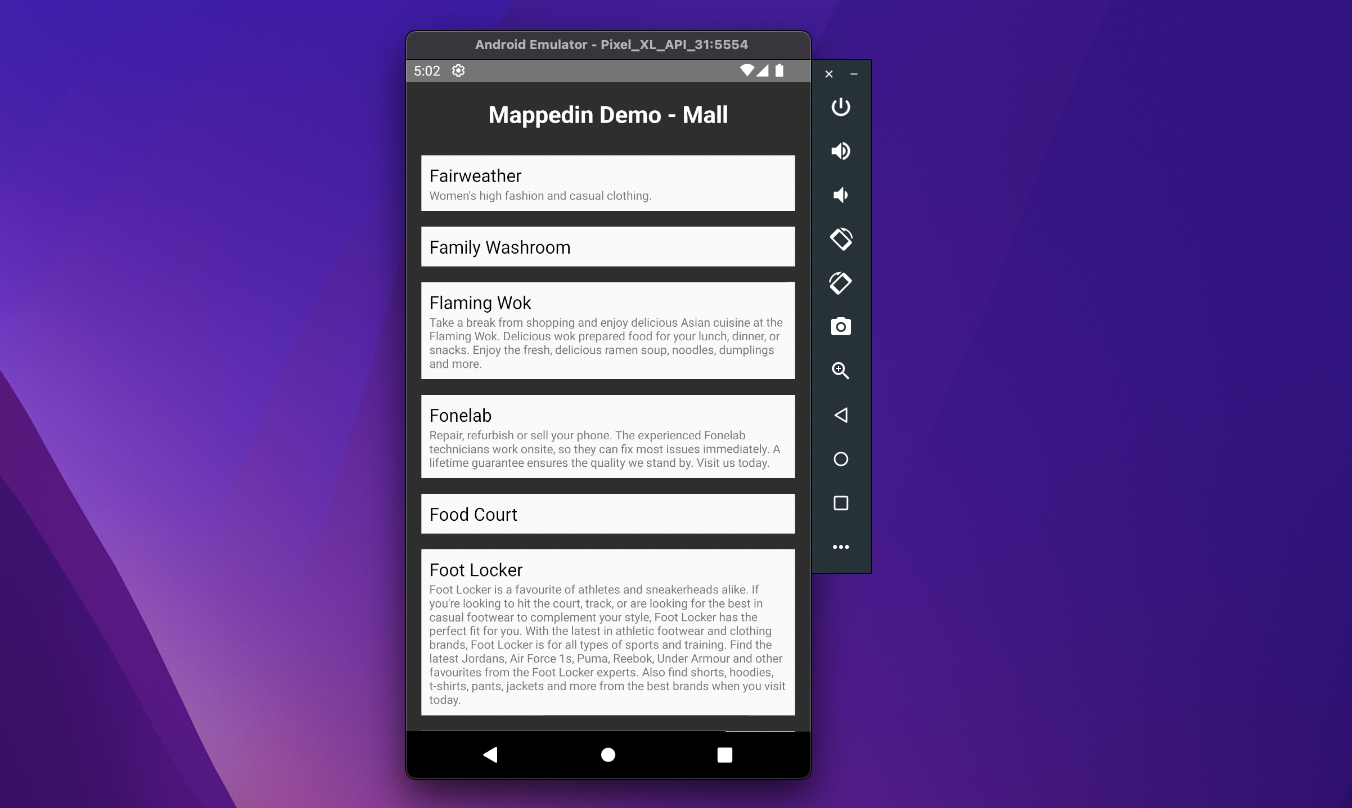
To do that, we need to set up a hook to asynchronously download the data when our <App /> component is rendered. A loading screen is displayed while venueData is not defined. Once the data is received, the component is re-rendered and should display Mappedin Demo - Mall, the name of our demo venue in the top left corner of the screen.
Remember to replace the clientId and clientSecret with the Trial API keys.
const App = () => {
	const [venueData, setVenueData] = React.useState<Mappedin>();

	React.useEffect(() => {
		async function init() {
			const venueData = await getVenue({
				clientId: '<MAPPEDIN_CLIENT_ID>',
				clientSecret: '<MAPPEDIN_CLIENT_SECRET>',
				venue: 'mappedin-demo-mall',
				perspective: 'Website',
			});
			setVenueData(venueData);
		}
		init();
	}, []);

	if (!venueData) {
		return (
			<View style={styles.loading}>
				<Text>Loading</Text>
			</View>
		);
	}

	return (
		<SafeAreaView style={styles.container}>
			<Text style={styles.venueName}>{venueData.venue.name}</Text>
		</SafeAreaView>
	);
};
Adding a list view
To display a list of locations, we use FlatList from React Native. <FlatList /> takes the location data and, in this case, we roughly sort it in alphabetical order based on the location name. Because React requires a key for each element, we define a keyExtractor. renderItem function defines how each item is displayed. We are rendering the location name and the description if it has any.
const LocationList = ({ locations }: { locations: MappedinLocation[] }) => {
	const renderItem: ListRenderItem<MappedinLocation> = ({ item }) => (
		<View style={styles.item}>
			<Text style={styles.title}>{item.name}</Text>
			{item.description && <Text style={styles.description}>{item.description}</Text>}
		</View>
	);

	return (
		<FlatList
			data={locations.sort((a, b) => (a.name > b.name ? 1 : -1))}
			renderItem={renderItem}
			keyExtractor={(item: any) => item.id}
		/>
	);
};
To render the list in our application under the venue name, we can now add <LocationList locations={venueData.locations} /> to our <App /> component's return.
return (
	<SafeAreaView style={styles.container}>
		<Text style={styles.venueName}>{venueData.venue.name}</Text>
		<LocationList locations={venueData.locations} />
	</SafeAreaView>
);
Styling
To add some basic styles, we can now fill our stylesheet with the following:
const styles = StyleSheet.create({
	item: {
		color: '#2E2E2E',
		backgroundColor: '#FAFAFA',
		padding: 8,
		marginVertical: 8,
		marginHorizontal: 16,
	},
	title: {
		fontSize: 18,
	},
	description: {
		fontSize: 12,
		color: '#777',
	},
	container: {
		backgroundColor: '#2E2E2E',
	},
	loading: {
		flex: 1,
		justifyContent: 'center',
		alignItems: 'center',
	},
	venueName: {
		margin: 16,
		fontSize: 24,
		fontWeight: 'bold',
		color: 'white',
		textAlign: 'center',
	},
});
Complete code example
import React from 'react';
import { FlatList, ListRenderItem, Text, StyleSheet, View, SafeAreaView } from 'react-native';

import { Mappedin, getVenue, MappedinLocation } from '@mappedin/react-native-sdk';

const LocationList = ({ locations }: { locations: MappedinLocation[] }) => {
	const renderItem: ListRenderItem<MappedinLocation> = ({ item }) => (
		<View style={styles.item}>
			<Text style={styles.title}>{item.name}</Text>
			{item.description && <Text style={styles.description}>{item.description}</Text>}
		</View>
	);

	return (
		<FlatList
			data={locations.sort((a, b) => (a.name > b.name ? 1 : -1))}
			renderItem={renderItem}
			keyExtractor={(item: any) => item.id}
		/>
	);
};

const App = () => {
	const [venueData, setVenueData] = React.useState<Mappedin>();

	React.useEffect(() => {
		async function init() {
			const venueData = await getVenue({
				clientId: '<MAPPEDIN_CLIENT_ID>',
				clientSecret: '<MAPPEDIN_CLIENT_SECRET>',
				venue: 'mappedin-demo-mall',
				perspective: 'Website',
			});
			setVenueData(venueData);
		}
		init();
	}, []);

	if (!venueData) {
		return (
			<View style={styles.loading}>
				<Text>Loading</Text>
			</View>
		);
	}

	return (
		<SafeAreaView style={styles.container}>
			<Text style={styles.venueName}>{venueData.venue.name}</Text>
			<LocationList locations={venueData.locations} />
		</SafeAreaView>
	);
};

const styles = StyleSheet.create({
	item: {
		color: '#2E2E2E',
		backgroundColor: '#FAFAFA',
		padding: 8,
		marginVertical: 8,
		marginHorizontal: 16,
	},
	title: {
		fontSize: 18,
	},
	description: {
		fontSize: 12,
		color: '#777',
	},
	container: {
		backgroundColor: '#2E2E2E',
	},
	loading: {
		flex: 1,
		justifyContent: 'center',
		alignItems: 'center',
	},
	venueName: {
		margin: 16,
		fontSize: 24,
		fontWeight: 'bold',
		color: 'white',
		textAlign: 'center',
	},
});

export default App;

For more examples in topics such as directions and BlueDot positioning in React Native, have a look at our example repository.